Professional Northern Lights photography (for idiots)
"So, what happens if we don't see the Northern Lights?"
This is a reasonable question to ask. It's a reasonable question if you're a sole traveller, spending hundreds to get to a bit of the globe where the Northern Lights are even a possibility. The Arctic costs a lot to reach, and you're guaranteed to need to make a big effort. Long days are followed by nights that are often longer and always colder. Equipment takes a beating (ask me how climbing a waterfall in Iceland a few years ago cost me a thousand pounds in repair bills to my backup camera). Photographically you always have to go the extra mile – even if you're just shooting for yourself there is a LOT of great Northern Lights photography out there, so setting up your 18-55mm on the cheapest tripod you could find and hoping for the best is never going to cut it.
So yes, the Northern Lights are a challenge however you attack them.

But here's the great thing about being an amateur photographer: if you attempt something and it goes completely wrong, you just don't tell anyone. You bin a camera's worth of outtakes and have another go the next year. What happens if you don't see the Northern Lights? Not much.
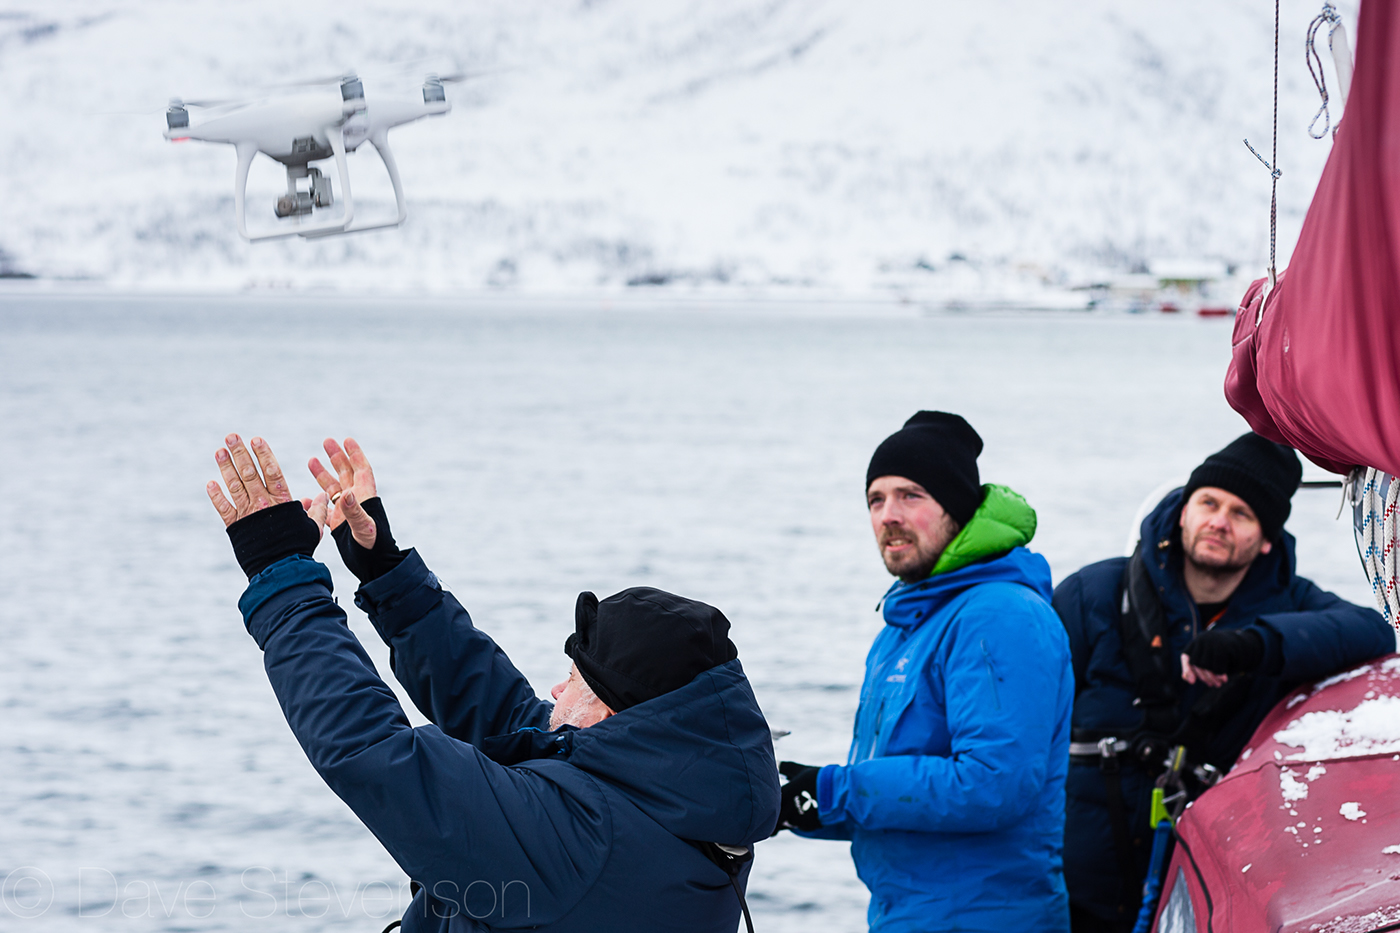
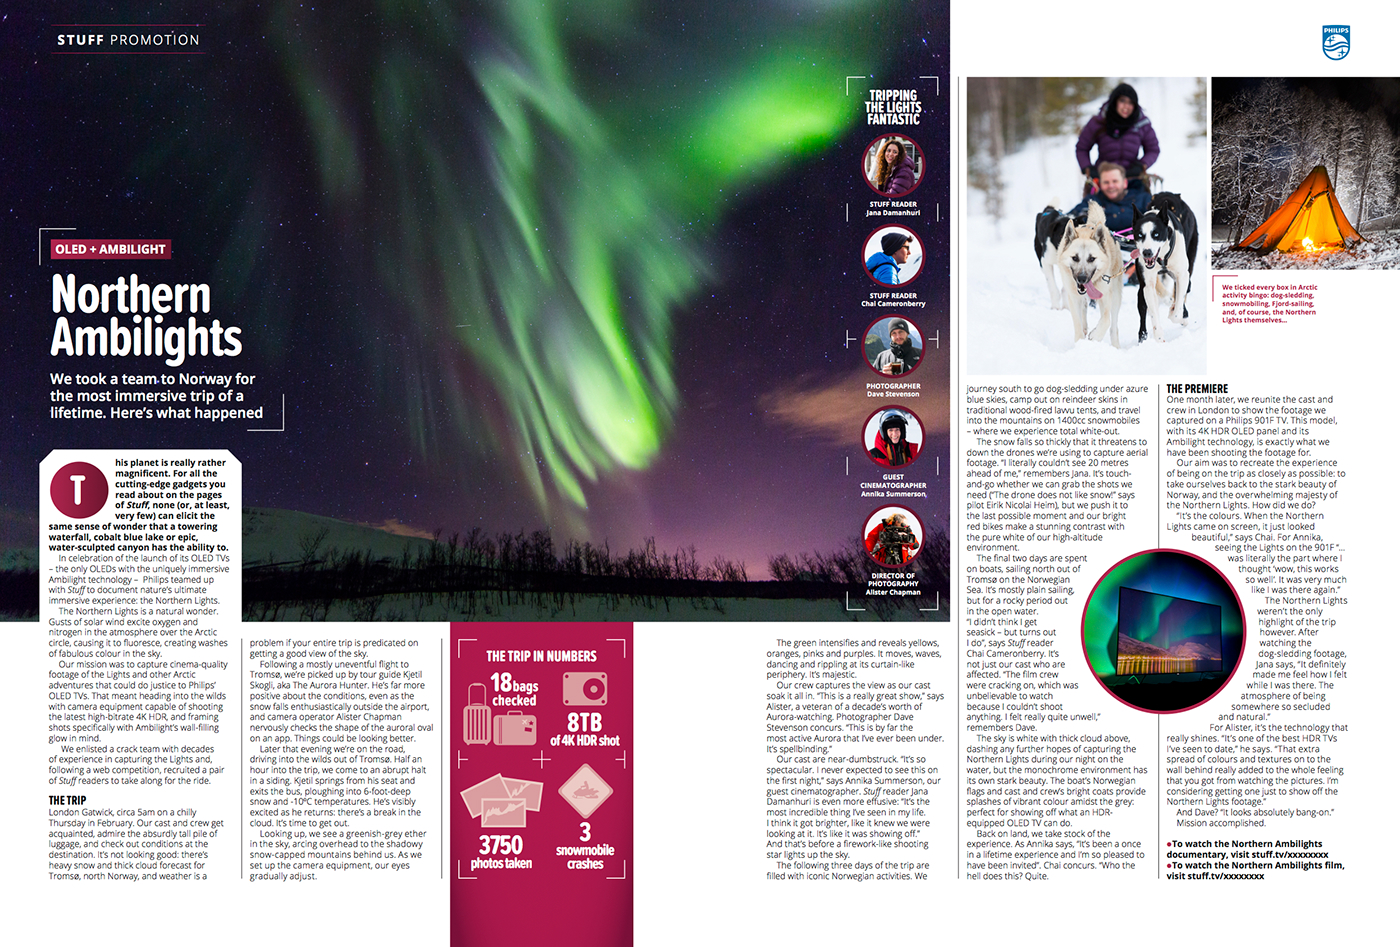
What happens if you don't see the Northern Lights as a professional? Bad Stuff. For this shoot, we promised Philips an incredible set of images and videos that would make their Ambilight TVs look the business. To do that, we built in a bunch of cool Arctic-type stuff – you know, snowmobiles, dog-sledding, awesome-looking locals – but the centrepiece was always supposed to be the experience of filming the Northern Lights, which, most nights in winter, you have a roughly 20% chance of seeing. They are INCREDIBLY weather dependent.


The plan was as simple as we could make it. Four days of intensive filming and photography, covering off as much as we could in whatever light we could get our hands on, and then five nights – if necessary – shivering in the cold, hoping to get as much Northern Lights material as possible.
We flew into Oslo. Half the crew nearly missed the connecting flight to Tromso. A big pile of kit immediately went missing. The snow fell lightly on the crew transport from thick grey skies. If omens are a thing, we did not have good ones.
Nothing ventured, of course, so we headed out. If we didn't get a good display on night one, we had four nights left to keep trying. Leigh – all round good egg (with whom I've worked on two other jobs since), director and cameraman for the documentary we ended up making – looked on the bright side. "If there are no Northern Lights for a few days, at least there's a bit of good jeopardy for the docco."
Poor old Leigh. Night one: boom.


For these shots I went with a tried-and-tested kit combo. A 5D MKIII (still failing to put a foot wrong despite my attempts to kill it over several Northern Lights adventures), and Canon's 14mm f/2.8. I've used that combo for night time work before (here I am illustrating a frankly depressing story about the US government's ongoing indifference to Native American land), and I love it. The fast aperture gives you OPTIONS, not least of which is dipping the ISO a bit for cleaner images. Image stacking for noise isn't really something that works with the Northern Lights, so you want the ISO as low as you can get it. I've had pretty good success shooting the Northern Lights on Canon's 24-105mm f/4, so you don't need a super big aperture... but it never hurts, and the client was paying.
Incidentally, night one was the night I banged off what might be my favourite frame of the trip.

Everyone, meet Alister. Alister's the man. He's very well known as a cameraman (I was on a shoot with him recently where he was spotted by fans THREE TIMES in, like, the middle of Nebraska) and, like me, is a natural world junkie who loves filming and photographing nature in all its weirdness and wonder. I started this exposure without – thinking about it – much of a plan. Shoot a long exposure and flick on a light at the end? Merge a frame of Alister with proper lighting with the Northern Lights frame? I dunno. Anyway, a few seconds into the exposure, a car hoved over the horizon and, ever so briefly, lit Alister and everything in my foreground before rushing off into the night.
Obviously the client has been told this shot is the result of meticulous planning and careful lighting.
Anyway, Northern Lights, dogsledding and snow mobiling are all things I've shot before, which doesn't make them any less fun. One thing I hadn't done before was work with native Sami people – the indigenous, nomadic folk who populate the wilds of Scandinavia. I've shot a few Sami people in Sweden, but these guys, because they were going to be in our film, really looked the part.


These guys were super fun to work with. For these frames I worked behind, alongside and underneath the camera crew, so there wasn't a lot of direction to give (rule one for unit photographers: know your place in the hierarchy). I used Canon's 85mm f/1.2, which I originally got because I thought waffer-thin depth of field would be fun. As it is, the 85mm f/1.2 isn't all that hot wide-open – but it gets positively absolutely amazing when you stop it down a bit. Bear in mind that stopping down three stops from f/1.2 is still about f/5.6, so you're still working with fairly shallow depth of field. And that thing, at that aperture, is SHARP. Believe me, you could print these portraits up the side of The Shard and they would bear up incredibly well.
Big thanks to Liam, Leigh and Alister who paid for, directed and filmed respectively.
Here are a few of the films we made.
And here's the making-of, which if you're anything like me you'll want to watch more than the actual advert itself.